IDP initiated Login with Keycloak

Situation
-
You have an application using OCID for authentication with Keycloak
-
You’re using identity brokering to allow other IDP’s (especially SAML) to SSO into your application using keycloak’s identity brokering.
-
It’s been working great when you log in using your applications log in screen (SP initiated log in) - but now you want users to be able to log in directly from their IDP. This usually takes the form of an application having a tile on the IDP home screen, or a “registered apps” area that starts the flow through to the application… and it’s not working.
Good news: It’s not too complicated a fix.
Solution
Summary
This has two parts: A Generic SAML Client & A POST redirect endpoint
Generic SAML Client: To enable IDP initiated log in it seems that Keycloak requires a SAML client in the realm that you want IDP initiated logins enabled. Some articles refer to this as a kind of “Proxy client”. However, one generic SAML client will enable it for all IDP’s that you want to connect.
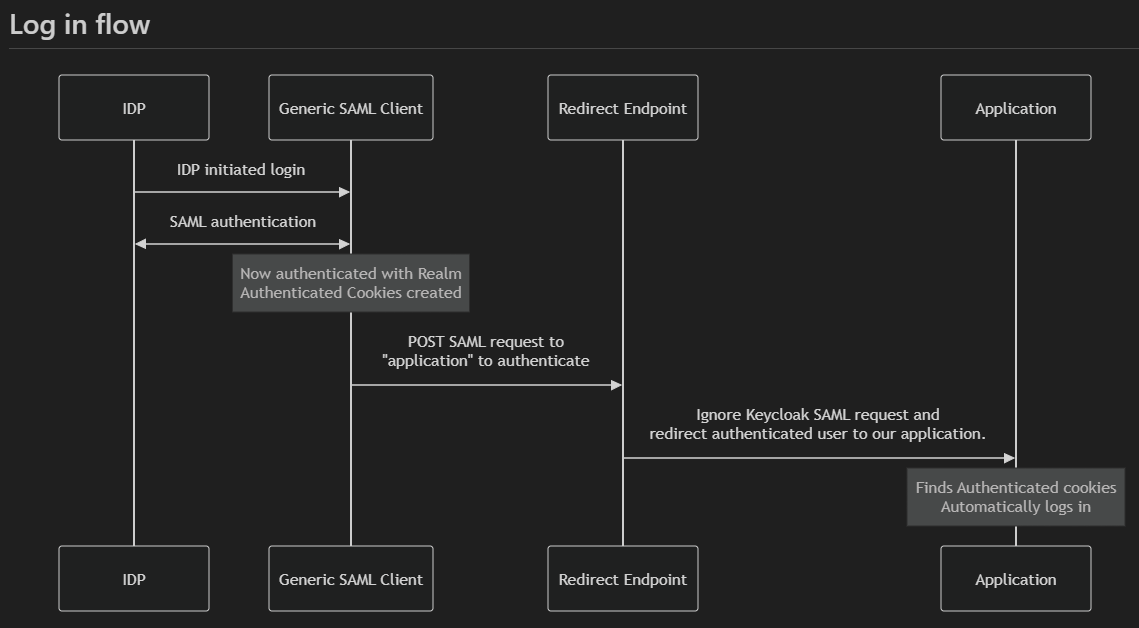
POST Redirect Endpoint: Along with the SAML client, you will need a simple POST endpoint that you can set to redirect to your application. From my vague understanding of how this works, the IDP initiates the flow, it goes to the Generic SAML Client which has some extra config to enable the IDP initiated login, it parses the SAML requests + responses, authenticating the user with this realm (at this stage the customer is “logged in”). It then tries to forward its own SAML request to an application (because remember, this is still a SAML client that thinks its interacting with a SAML application, but we’re not wanting that part), in the form of a POST request. As mentioned an additional step of setup outside of Keycloak is to have a POST endpoint that 302 redirects to your application. The fact that keycloak SAML post request is ignored does not matter as you have authenticated already and when you land at your application after the redirect, you will be logged in.
Do not worry if this doesn’t make sense before reading the rest of this article, it will hopefully make more sense as you understand the flow.

Steps for Service Provider
Create the SAML client
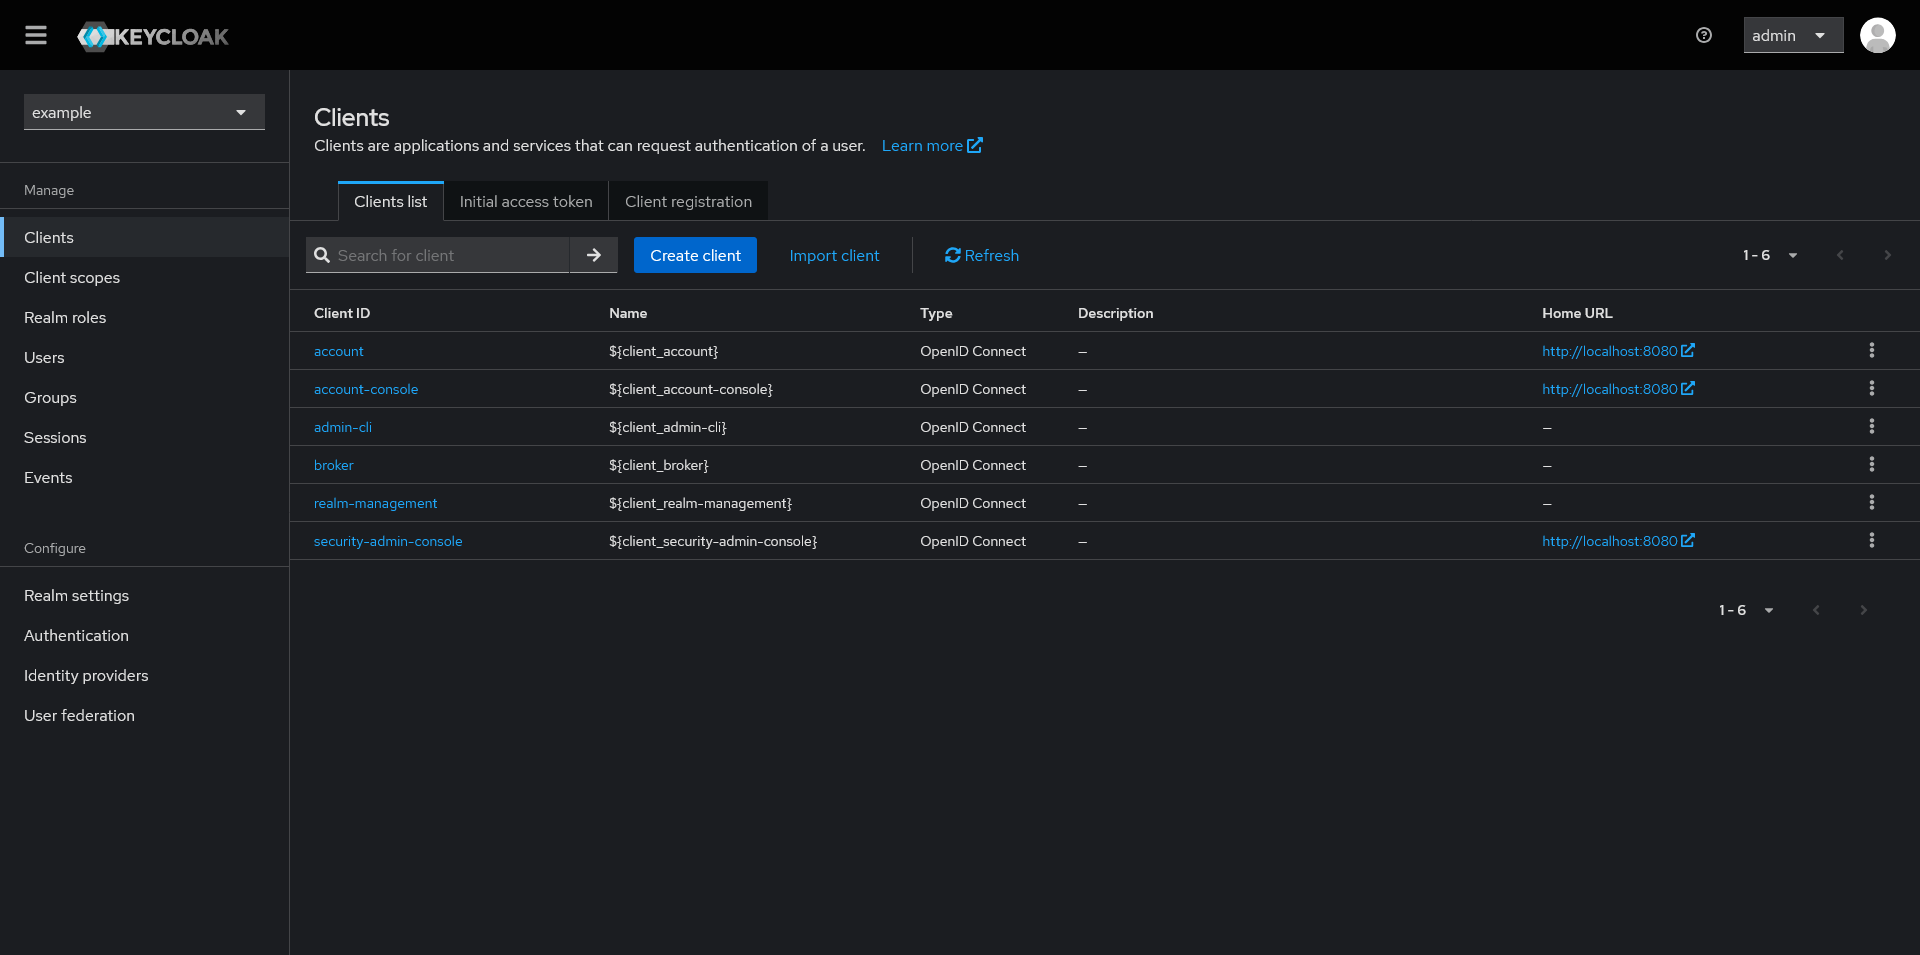
Navigate to the Clients section of Keycloak and select “Create Client”

For “Client type:” Select SAML.
The rest of the details you can configure as you want, but the “Client ID” will be “Generic-SAML-Client” for this example.

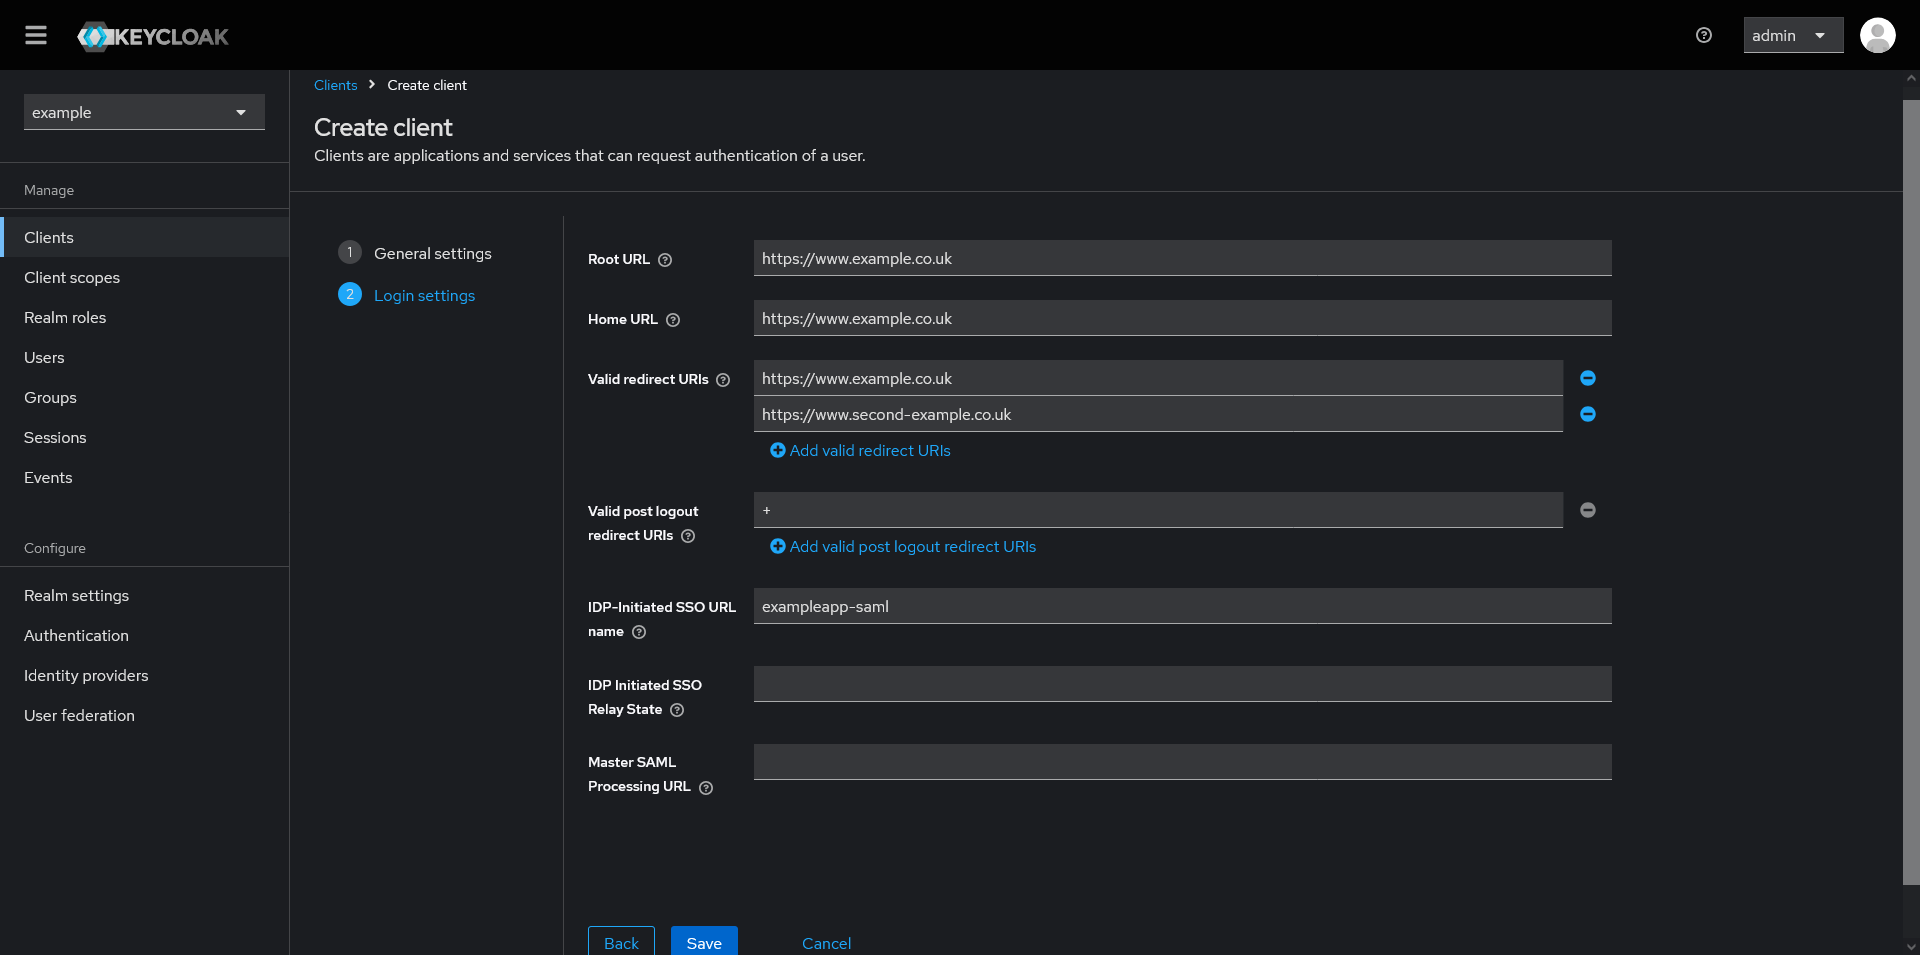
On the next screen, enter the applicable URL’s for your application. In this example my application is found at “https://www.example.co.uk” and an older URL that we still want to support “https://www.second-example.co.uk”.
The important part of this screen is the “IDP-Initiated SSO URL name”. This is the name of the client that we will use later, and that we will give to the customer when registering their IDP during SAML setup. You can call this what you like but I have typically gone with the “~name of the application~-saml”. It is “exampleapp-saml” in this example.
Once those details have been entered, click save.

Your new client should appear, you might need to update some settings for your SAML configuration, such as the “Name ID format” if you are using something like “email” instead of the default “name”.

Next navigate to the Advanced tab, and scroll to the “Fine Grain SAML Endpoint Configuration” section.
In the “Assertion Consumer Service POST Binding URL“ add the URL to your backend application that redirects to your application, in this example it is “https://backend.example.co.uk/keycloak/login”.

Create the redirect endpoint
Our application is running an express backend so our redirect endpoint is very simple:

Using a environment variable allows us to set the redirect URL for different environments and update it without redeploying the code. In this example:

Steps for Identity Provider
After all this has been completed you need to include one extra URL in the SAML setup on your Identity Providers config.
On the IDP setup screen on Keycloak you will see a redirect URI at the top:
”http://auth.example.co.uk/realms/example/broker/idp-saml/endpoint” in this example

This is typically the URL you will use for the “Assertion Consumer Service (ACS) URL” on the identity provider config, which is correct. However, to enable IDP initiated log in now with our additional Generic SAML client we need to include an additional ACS URL as shown below:
http://auth.example.co.uk/realms/example/broker/idp-saml/endpoint/clients/exampleapp-saml
This is <root-url>/realms/<realm>/broker/<IDP alias>/endpoint/clients/<IDP-Initiated SSO URL name from the generic client created earlier>
-
This is mentioned, but not described well in the keycloak documentation here: Server Administration Guide
So in your IDP configuration you should have:
http://auth.example.co.uk/realms/example/broker/idp-saml/endpoint/clients/exampleapp-saml
http://auth.example.co.uk/realms/example/broker/idp-saml/endpoint
The first one allowing IDP initiated login, routed through the Generic SAML client and then the redirect endpoint.
The second one allowing normal SP initiated login (login triggered through the application).
Conclusion
After completing these steps you should be able to login through the application as normal, as well as through the tile / “registered applications” area of the IDP.
This one generic client can be reused for as many different IDPs as you like, just ensure you include both URL’s mentioned in the “Steps for Identity Provider” section, changing the /broker/<IDP alias>/endpoint/cli… for each IDP.
Links to discussions / guides that helped form this guide:
https://www.lisenet.com/2020/keycloak-with-okta-idp-initiated-sso-login/